Praktika Newsletter October 2013
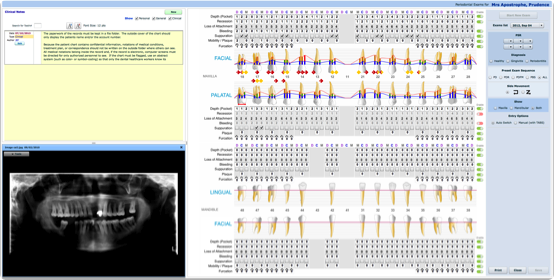
Periodontal Charting – Overhaul
Please welcome the redesigned Praktika Periodontal Charting. Its new structure and functionality are the result of collaboration with our customers who provided a lot of useful and insightful feedback and recommendations. As with all the latest major changes in Praktika we still keep the old units operational while providing the new ones as a selectable option in your practice settings. This allows users who are happy with the existing features stay happy, while providing new functionality for those who need it.

Watch it on YouTube
The main features of the new Periodontal Charting are
- automated input (the focus jumps to the next input automatically after you enter a value)
- ability to configure the exam sequence or use one of the presets
- added PSR / CPITN input
- added Diagnosis selector
- increased (scaleable) size of the charts to improve visibility
- incremented bleeding values (from 0 to 3)
- fractional mobility values (1, 1+, 2, 2+, 3)
- ability to enter negative Recession values
- corrected graphs (spline smoothing, more precision, corrected calculations)
- ability to print charts
- added Clinical notes and Imaging section that allow to see X-Rays and write proper clinical exam notes
- split screen controllers allowing to adjust the view size for better visibility
- ability to see historical snapshots of patients’ dentition and exams, and others.
Our great thanks go to everyone who provided the recommendations and feedback for this redesign. Please do not stop: we would welcome any feedback regarding our new Periodontal Charting so that we could polish it even better.

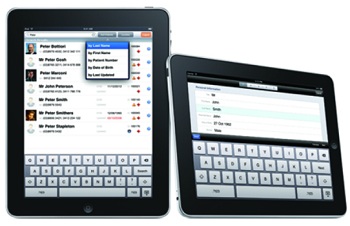
Periodontal Chart Practice Settings
Go to Management -> Practice Details -> Perio button. The setting allow you to chose between the existing Perio Charting and the new one. You can also choose which type of PSR/CPITN input you are utilising and set the default jaw visibility (show them both or one at a time). The latter can be changed from the chart window as well.

PSR / CPITN Input
This input allows you to enter the corresponding exam values by sextants. Either select a value from a drop down list or set the focus on the input and type a value on your keyboard. You can also select a diagnosis value in this control.

Customise Exam Sequence
To select your exam sequence you can either select a preset one (PD, PDR, etc.) or completely customise it by enabling and disabling particular inputs. Green selector means the input is enabled, while the red one shows disabled rows.
You can also set the direction of input automated focus switching: by a measurement or by a tooth. In the first case the focus will switch between teeth while staying in the same measurement, in the later it will stay in the same tooth for all the enabled inputs.

Perio Imaging and Clinical Notes Panels
The imaging panel provides a list all all the patient’s images in ascending order by date. Double click on a particular image to view it, adjust the window size by using the split widow handles. Use the tools to zoom and rotate the image.
Start a new clinical note to record the exam observations. Old perio exam and per tooth notes are deprecated in this new release.

Improved Dentition Panel
The improved Dentition Panel introduced more teeth types and possible combinations. The panel can be utilised to configure the oral cavity before a Periodontal Exam probing.

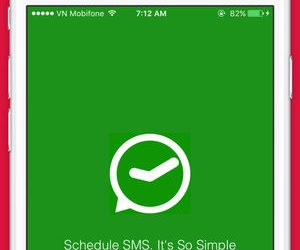
Bulk SMS from Patient Directory and Recalls
Bulk (groups) SMSing is now available at the Patient Directory and Recalls. Select a number of patients and either send SMS immediately or schedule them for some time and date in the future.

Supernumerary Teeth
Supernumerary teeth were added in the Restorative Charting. To enable them go to Management -> Practice Details -> Restorative and tick the “Supernumerary Teeth” check box. Their placeholders will appear above the “standard” teeth in the chart.

Assignment of a Provider to a Completed Appointment
The automatic assignment of a provider to a completed appointment now happens along the following pattern:
– provider the appointment is assigned to
– if none, then the preferred provider specified in the patient file
– if none, then the provider who completed the appointment
– if none, then the first provider in the list

List of feature improvements in the current release
- Recall screen displays the patient’s age and notes (sortable)
- Autoclave labels – ability to remove entries
- Optional printing of document footers (Practice settings)
- Cheque details added to Tax Invoices
- Editing Schedule and appointments in the past (Practice settings enabled feature)
- Practice Manager can edit or delete any appointment notes
- Reports – added location in the printed headers
- Deposits – filtering by start / resignation dates of providers
- Upcoming appointment printout to show treatment types.
- Quotation synchronisation improved.